GL MT3000 Setup
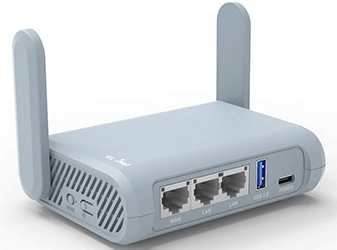
Another name of Beryl AX is GL MT3000. It is a pocket friendly Wi-Fi 6 device that is compatible for travel. It is a dual band device that offers a combined speed up to 2976 Mbps. The device is run on MT7981B 1.3 GHz dual core processor. Furthermore, the device offers a more secure internet as an open VPN and wire guard is already installed in it. Setting up GL MT3000 is very simple. One can perform the GL MT3000 setup on their own with adequate knowledge. To configure the Beryl AX you don’t need any technical expertise.
GL MT3000 Setup- Initial Process
Setup process of Beryl AX begins with the hardware setup. To set up the hardware of the device you need to follow the Philo mentioned steps:
Power up Beryl AX
To initiate the process the first step is power up GL MT3000. In the package you will get a power adaptor with which you can turn on the power of the device. Insert the power adaptor cable into the power port of the device. Push the power button to turn the power on. As the device power is on you will notice the LED turn on given on the front of the device.
Connect to Beryl AX
Next step of the process is to connect with the GL MT3000 device network. You need a client device to establish this connection which is Wi-Fi enabled or has an Ethernet port. For this connection you can use wired method or wireless method.
- Wired method is very simple. Insert the ethernet cable into the Ethernet port of your client device. Insert the other end of the same cable into the Beryl AX.
- Wireless method required to follow below mention steps:
- First of all you need to go to the settings of your mobile or computer or laptop device
- Thereafter you need to go to the Wi-Fi settings.
- Run a scan for the available networks.
- Here you will see the default SSID of the GL MT3000.
- Click on the default SSID name and the device will ask for password.
- In the password field you need to enter Goodlife.
- Click on connect option and your client device will connect to the GL MT3000 network.
Once your Beryl AX is turned on and you establish a connection between your client device with its network then you can move ahead to complete the configuration. For the GL MT3000 setup you can opt any of the below given method. Processes through both the methods are simple.
GL MT3000 Setup- Web Based
Launch Web Browser
To initiate a web based GL MT3000 setup the first step is launching a browser. You can use any of the web browsers you have in your computer or desktop. You can go for Internet explorer, Google Chrome, Mozilla Firefox, Safari or other browsers. Make sure the browser you are using is the latest version of it.
Access Beryl AX Web Interface
Second step in the GL MT3000 setup process is to access the web interface. For that you need to go to the URL bar of your browser. Mention the default IP in it and click on enter button on the keyboard. This will open the GL MT3000 web interface on the screen.
Configure Beryl AX
You can initiate the configuration of your GL MT3000 device by following the screen. Select the language firstly to move ahead with the process. Then move ahead by creating a secured password for your admin account. Next you need to go to the settings from the admin home page. There you will find an option called “internet”. This will open further options to connect your device with the internet. You can choose any of the methods to connect the device with the internet. Follow the screen and complete your GL MT3000 setup by clicking on apply option.
GL MT3000 Setup- App Based
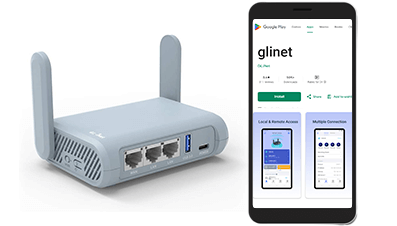
App based setup of GL MT3000 is a quick and easy process. For this method you need a smartphone or tablet device to install the app.
Download Glinet App
Initiate the process by downloading the glinet app from the Google Play Store or App store as per your device system. Go to the search bar and search for the app. Click on the install option to let the app download on your phone. Once you get the application you can proceed the setup
Configure Beryl AX
Configuring the Beryl AX is simple with the app as well. You need to launch the app and then choose the language with which you desire to proceed. Create a strong password for your admin account and connect your device with the internet by accessing the settings. The mobile app will guide you with the process. You need to click on apply option once the setup is complete.