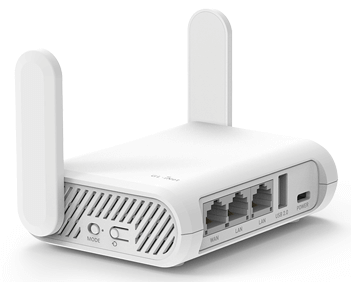
GL.iNet Router Setup
GL.iNet is a trusted brand in networking devices, offering travel-friendly, secure, and high-performance routers. Whether you need fast internet at home, in the office, or while traveling, GL.iNet routers are designed to deliver reliable connectivity. With simple gl inet travel router setup steps, advanced security, and compatibility with OpenWRT, these routers are ideal for both beginners and advanced users.
In this guide, we’ll cover everything you need to know about GL iNet router setup, including prerequisites, step-by-step installation, benefits, and troubleshooting tips.
Why Choose GL iNet Routers?
GL.iNet routers come with several advantages that make them stand out:
- Easy Setup: Configure using a web interface or mobile app.
- Portable & Travel-Friendly: Enjoy stable internet while on the go.
- OpenWRT Compatibility: High customization and network control.
- Dual-Band Support: Faster internet with minimal interference.
Prerequisites for GL iNet Router Setup
Before starting, make sure you have:
- A GL.iNet router
- Power adapter (included with the device)
- Ethernet cable
- Computer or laptop with internet access
- GL iNet Travel Router Setup guide (comes with the router for default info)
Step-by-Step GL iNet Router Setup
1. Power Up the Router
- Plug the power adapter into your GL.iNet router and a power outlet.
- Turn on the device; the LED light will indicate it’s powered.
2. Connect to the Router Network
You can connect via Ethernet (wired) or WiFi (wireless):
- Wired: Use an Ethernet cable to connect your computer to the router.
- Wireless:
- Turn on WiFi on your computer.
- Look for the default network name (SSID) shown on your router.
- Enter the default password: goodlife.
3. Access the Web Interface
- Open a browser and type http://192.168.8.1.
- Select your language.
- Create a new admin password to secure your router.
4. Configure Internet Connection
Choose one of the following connection methods:
- Ethernet cable
- Tethering (via USB)
- Cellular connection
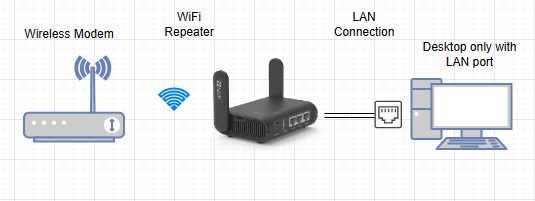
- Repeater mode (extend existing WiFi)
Follow the on-screen instructions to complete the gl inet Travel router setup.
5. Update Firmware
- Always check for the latest firmware updates.
- Updating ensures better performance, features, and security.
6. Finalize Setup
- Save all changes and reboot the router.
- Connect your devices to the new WiFi and test the internet.
GL.iNet Router Troubleshooting
if you face issue during gl inet travel router setup, try these quick fixes:
- Verify all cable connections.
- Restart the router and your devices.
- Ensure you are using the correct IP address (192.168.8.1).
- Try setup via the GL.iNet mobile app if the browser fails.
- Check your primary internet connection (ISP).
- Update the router firmware.
- Reset the router to factory settings if the issue persists.
If the problem continues, our technical experts can guide you with GL iNet router Setup and troubleshooting support.
GL iNet Travel Router Setup Using App
You can perform GL iNet Router Setup using your smartphone. Get the glinet app and initiate the setup process very easily. Steps you need to proceed with to complete GL iNet Travel Router Setup using app are as under:
Download GL iNet App
- Make sure your smartphone has a working internet.
- Open app store/ google play store.
- Search “GL iNet” and the app appears.
- Download the app by clicking on the install option.
Power Up The Router
- Turn on the device using the power adapter & wall socket.
- Wait for the LED to turn on and be stable.
Connect Smartphone with Router
Step forward towards GL iNet Travel Router Setup by connecting your smartphone with the router. For connection:
- Access smartphone’s settings
- Look for the default network name (SSID).
- Enter the default password: goodlife.
- Click on connect option.
Access GL iNet Router Setup Page
- Launch the app and create an account.
- Follow the screen to access the router settings.
Configure Router
- Choose the internet option from settings.
- Connect to internet using any of the four options
- Ethernet cable
- Tethering (via USB)
- Cellular connection
- Repeater mode (extend existing WiFi)
Follow the on-screen instructions to complete the GL iNet Travel router setup.
Update Firmware
- Check for the firmware version of the router.
- Update it if an updated version is available.
Finish Setup
- Save all changes and reboot the router to finish GL iNet Travel Router Setup
- Connect your devices to the new WiFi and test the internet.
Need Help with GL iNet Router Setup?
We’re here to assist you 24/7.
- Live Chat: Chat with experts for instant solutions.
- Call Support: Dial +1 716-992-6371 and get help directly from our team.
Get your GL.iNet router running smoothly and enjoy seamless internet connectivity wherever you are.
Frequently Asked Questions
The default IP address for accessing the GL.iNet router setup page is 192.168.8.1.
The default WiFi password is goodlife. You can change it later during setup for security.
Connect your computer to the GL.iNet router (wired or wireless), open a browser, and type 192.168.8.1. Then set your language and create a new admin password.
Log in to the admin panel → go to System → Upgrade Firmware → check for the latest update → install it. Updating firmware improves performance and security.
Press and hold the reset button (usually located at the back) for about 10 seconds until the LED starts blinking. The router will restore factory settings.
Check your ISP connection.
Restart the router.
Ensure cables are properly connected.
Try updating firmware.
If the issue persists, reset the router and reconfigure.
Yes. GL.iNet travel routers are lightweight, portable, and designed for stable internet connectivity while traveling.