GL B1300 Setup
The GL B1300 is an OpenWrt dual-band mesh router. It is popularly known as Convexa-B. Moreover this router from GL.iNet is perfect for both commercial and home users. After the successful GL B1300 Setup, you can enjoy high bandwidth online activities with complete ease. To gather more information about this magical router, you need to read this guide till the end.
Convexa-B Operates On Dual-Bands
The GL B1300 setup won’t disappoint you with its speed and range. All thanks to the dual frequency bands. The Convexa-B mesh router operates on one 2.4 GHz band and one 5 GHz band. On the 2.4GHz band you get the speed of 400Mbps whereas on the 5GHz band you acquire speeds of upto 867Mbps. This means high speed for all your devices and wider range as well.
GL B1300 Setup Comes With MU-MIMO and Beamforming Technology
With MU-MIMO technology users get to connect multiple devices simultaneously. Connecting multiple devices doesn’t mean drops in signals or poor connectivity. Rather each device will get the desired bandwidth no matter how many devices are using the internet. Further, with the beamforming technology, the router directs its signals directly towards the devices. Therefore, the GL B1300 Setup is worth every penny.
GL B1300 Supports High Security
Convexa-B or GL B1300 Setup supports best security encryption and authentication with OpenVPN. Moreover the WireGuard provides users with a layer of privacy. Additionally, with the brand new Web UI 3.0, users can set up a VPN server easily. It simply means you can access your important documents or files securely even when you are far away from your home.
Overview Of GL B1300 Setup
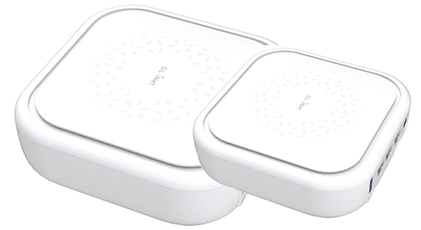
The GL B1300 Setup comes with one WAN port, two LAN ports, one USB3.0 port and a power port for turning on the router. For easy and quick setup users get three smart LED light indicators on the top panel. One is power LED, mesh LED and lastly a wireless LED. In addition you get a reset button and a mesh button.
Coming to the package contents, users get:
- Firstly, a Convexa-B router
- Secondly an Ethernet cable
- Next, a power adapter with a converter based on your shipping address.
- Lastly, a user manual.
Do not forget to collect the warranty card as well. Before jumping on to the GL B1300 setup steps, it’s advisable that the user reads the user guide at least once. This way you can easily complete the setup without any confusion.
Getting Started With GL B1300 Setup
The steps for the GL B1300 setup are so simple that even a non-tech individual can perform it without any hassle. First of all, carefully place the Convexa-B in a central location of your place, be it your office or your home. The placement plays a crucial role in how the router performs. Therefore strategic placement is necessary.
Consider some simple placement points like, do not place the router inside a closed box, between thick walls, near electronic or metal objects or behind furniture set. Rather place it in a well-ventilated area as well as in an elevated position. Basically the aim is to let the signals of the router travel freely.
Installation Steps
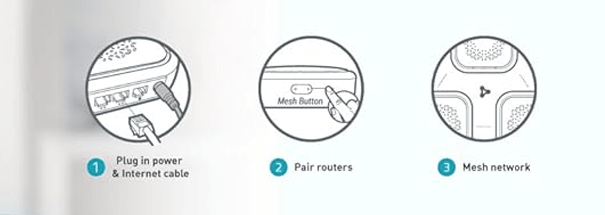
- Plug the power cable into the power port of the Convexa-B.
- Turn it on and let the power LED stabilize. Do not hop on to the next step, until the power LED solidifies because this can lead to incorrect or unsuccessful GL B1300 Setup.
- Moving further it’s time to connect your client device to the Convexa-B. Users have two options for the same.
Connect Via LAN
Take the Ethernet cable. Connect it to the LAN port of the Convexa-B. Plug in the other end of the cable into your client device.
Connect Via Wi-Fi
Don’t want to establish a wired connection? No worries! Toggle the wifi. From the list of available networks connect to the network name GL-B1300-XXX. You now need to enter the default password which is set as “goodlife”.
- As the device is now successfully connected to the Convexa-B. It’s time to make use of a web browser for completing the GL B1300 setup.
- So open a web browser. It’s recommended to either go with Google Chrome or Firefox. Head towards the URL bar. Type http://192.168.8.1 and hit enter. If the internet browser redirects you to the Luci then instead of using http://192.168.8.1 you can use http://192.168.8.1/index.html .
- Now you have access to the web admin panel. Firstly select the language and hit enter.
- After that, you need to set up the admin password. The admin password should contain at least five characters. As you fill the password and confirm it, hit the Submit option.
- Finally, you now have access to the admin panel. Now you just need to follow the web instructions one by one, to complete the GL B1300 setup.
Connect To Our Experts!
For any issues, queries or assistance, feel free to connect to the experts.