GL MT6000 Setup
GL.iNet offers a wide variety of home and office routers. One such masterpiece is the GL MT6000 router which is popularly known as Flint 2. It offers so many features that makes it worth the investment. So in this guide we’ll be sharing the complete feature set and easy GL MT6000 setup process.
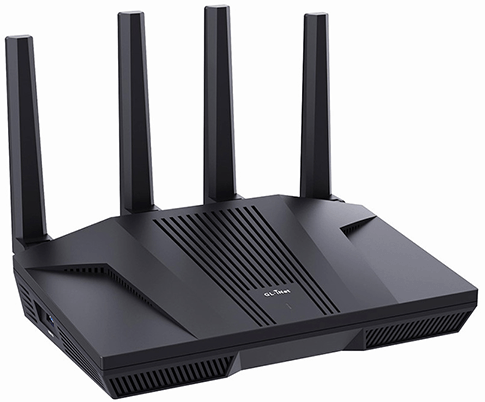
Overview Of Flint 2
The GL MT6000 setup operates on wifi 6 standards. Thus users get to experience blazing fast internet speeds. Further the router comes with dual frequency bands which means wider coverage and reliable connectivity throughout your abode.
The maximum speed of 900 Mbps is offered on the WireGuard VPN whereas the speed of 190 Mbps is offered by the OpenVPN. Additionally with pre-installed AdGuard you can block irrelevant pop ups of ads or any other annoyances.
Further, after a successful GL MT6000 setup, you can connect more than 100 devices. None of the devices will face even a single drop in the signals. Moreover with the help of parental control features you can sneak on the web activities of your child. Easily block inappropriate websites, setup time limits and filter content as per your requirements.
Moving further, Flint 2 offers multi WAN. It means if one of the internet methods fails, the GL MT6000 setup automatically connects to the other available connection. The four connection methods are cellular, tethering, wifi and ethernet. Thus it offers you a smooth and uninterrupted networking experience.
What’s Inside The Package?
For completing the GL MT6000 setup successfully, you need all the components that comes inside the package like:
- Firstly, GL MT6000 router
- Next, a power adapter
- An Ethernet Cable
- After that one user manual.
- Lastly, a converter.
Apart from this there is a warranty card and a thank you card. But the items in the package are not sufficient for the router to work properly. Therefore, for the first time setup, users need a smart device, an activated modem and a power socket.
Place The Flint 2 Strategically For Complete Coverage
Inappropriate placement of the GL MT6000 setup can cause a lot of connectivity issues. Therefore, strategic placement is extremely important.
- Place the Flint 2 nearby your existing modem, especially during the first time setup.
- Next, do not place any electronic and metal objects in the near premises of the router. For eg: refrigerator, cordless phones, microwaves, security cameras, aluminum doors, baby monitors and alike devices can mess the signals of the router.
- Keeping the GL MT6000 setup in between thick walls be it of glass or concrete will cause connectivity issues therefore avoid this place as well.
- Place the router in an open, well-ventilated and on an elevated surface like table top, shelf or you can even mount it on the wall.
Powering Up The Flint 2
After the finalization of the placement of the router, it’s time to power it on. For powering on Flint 2, pick the power adapter. Slip in the power pin of the adapter into the power port of Flint 2. Now push the power adapter into a power socket and turn it on. The power LED lights up. In case it doesn’t light up, then recheck the wired connection, it shouldn’t be loose. If everything is fine and still the router doesn’t turn on, then connect to the other power socket. As it turns on, move to the installation steps.
Installation Guide For GL MT6000 Router
The GL MT6000 setup steps are so easy that even a non-tech user can perform it independently without any hassle.

- Firstly, pick your smart device. It can be any device from your collection like a smartphone, laptop, computer or even an iPad.
- Moving further connect the device to the Flint 2. For wireless connection, toggle the wifi by visiting the wifi settings of the device. A list of networks appears. From it select GL MT6000 and for connecting fill up the password. Check the product label for gathering this information.
- Another option for connecting the device to Flint 2 is using the ethernet cable. For this slip in one end into the ethernet port of the smart device. The other part of the cable slips into the GL MT6000 router.
- After the connection, open any internet browser. Make sure it is updated to the latest version and is not corrupted.
- As you open the browser, move to the address bar, use the default IP address that is http://192.168.8.1 and push the Enter key.
- Now, fill up the password, confirm it and tap on “Submit”. Here you get access to the web admin panel.
- Select one of the four methods, and to complete the GL MT6000 setup, follow the on-screen instructions.
Note: Finding the web based setup method a little time consuming? If yes, no worries as there is an alternative which is using the GL.iNet app. Simply get the app on your smart device and follow the app prompts for completing the setup. For queries, issues and assistance feel free to connect with the experts.